Renting on Sia#
Before following this article in order to set up your own renter with Sia-UI on Windows 10, we recommend to learn the technical details to how renting works by visiting the Introduction to Renting that I also wrote.
Renting on Windows 10 with Sia-UI
So first off you’re gonna want to head to the official Sia website. And head to the download page.
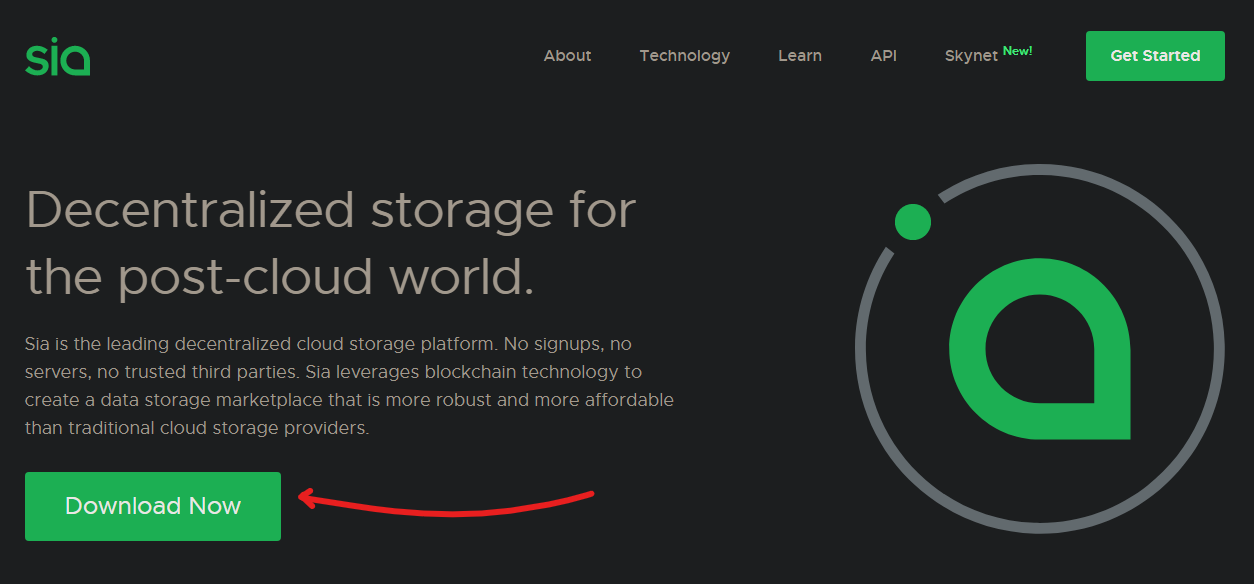
Then from there download the windows binary.
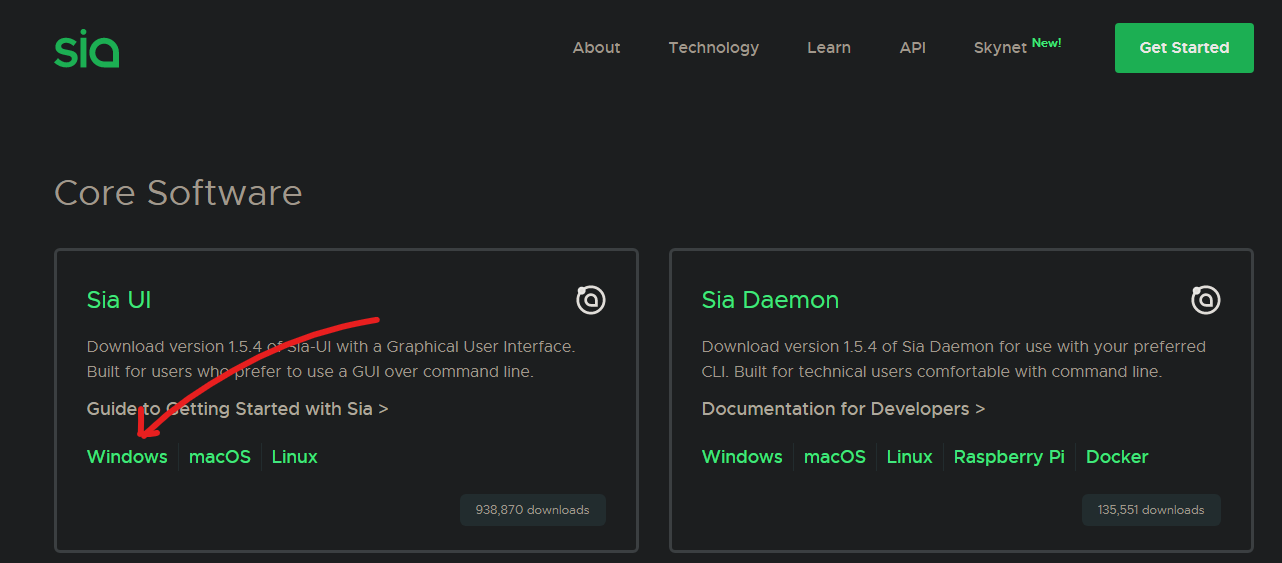
Note, if you would like to compile it from the source, you can find the daemon code here, and the UI code here. But in all likely-hood if you can do that, you don’t need this article ;p
Now click on the .exe file that has been downloaded. Now windows doesn’t like cryto apps at all. So windows will automatically block the file when you try to open it. Thankfully, it’s easy to get around. Just click “more info”
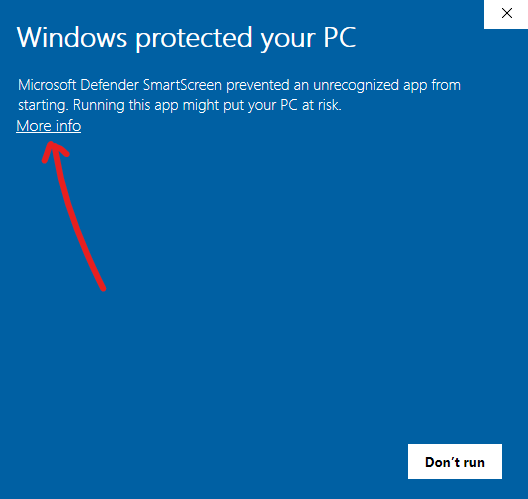
And then “Run Anyway”

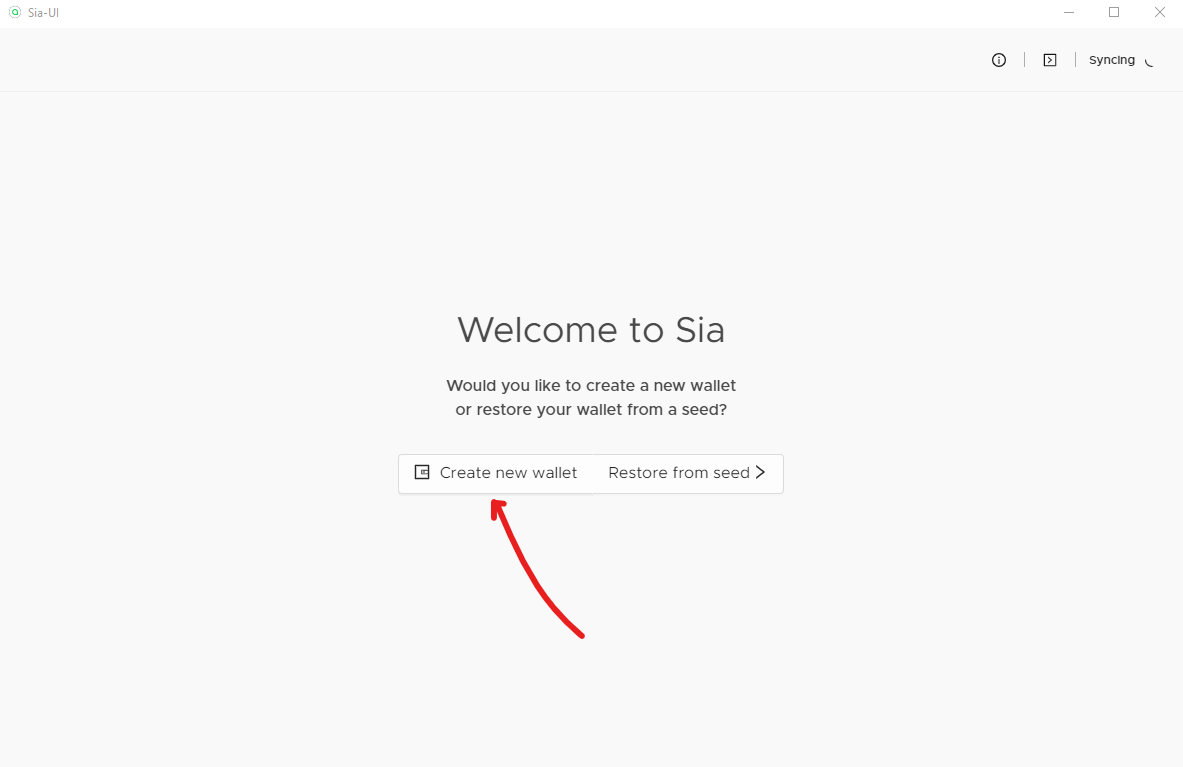
Now let it run with administrator privileges. Once that is open you’ll either want to put in your own seed, or generate a new one. For this article we will be creating a new seed.
Also, side note say what a seed is. A seed is effectively your “password.” Though unlike normal passwords it’s a cryptographic private key that all your data is encrypted with and cannot be changed. For a more detailed breakdown of how seeds work and how to keep yours secure, read here.
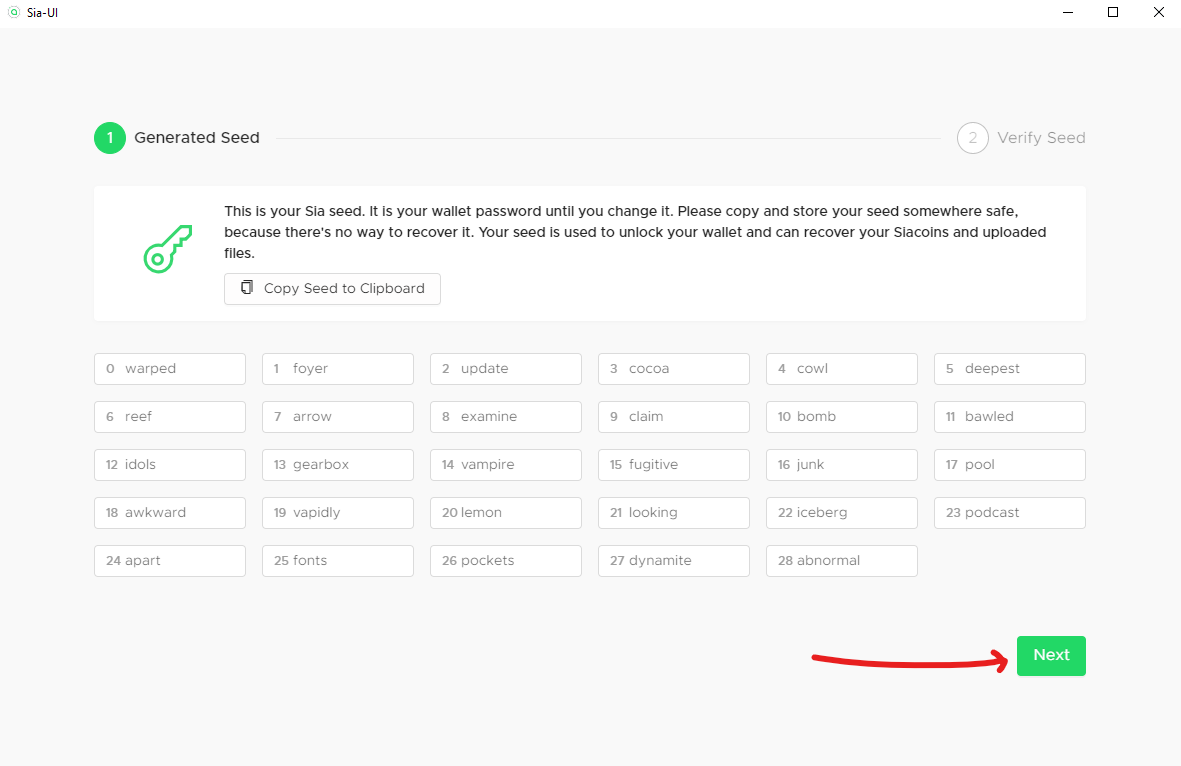
Now you will be given a seed that is your unique identifier. DO NOT share this with anyone. If they have this seed, they have all of your SC and your data isn’t safe. For more info read here. So now save this seed to a safe place and click “next”
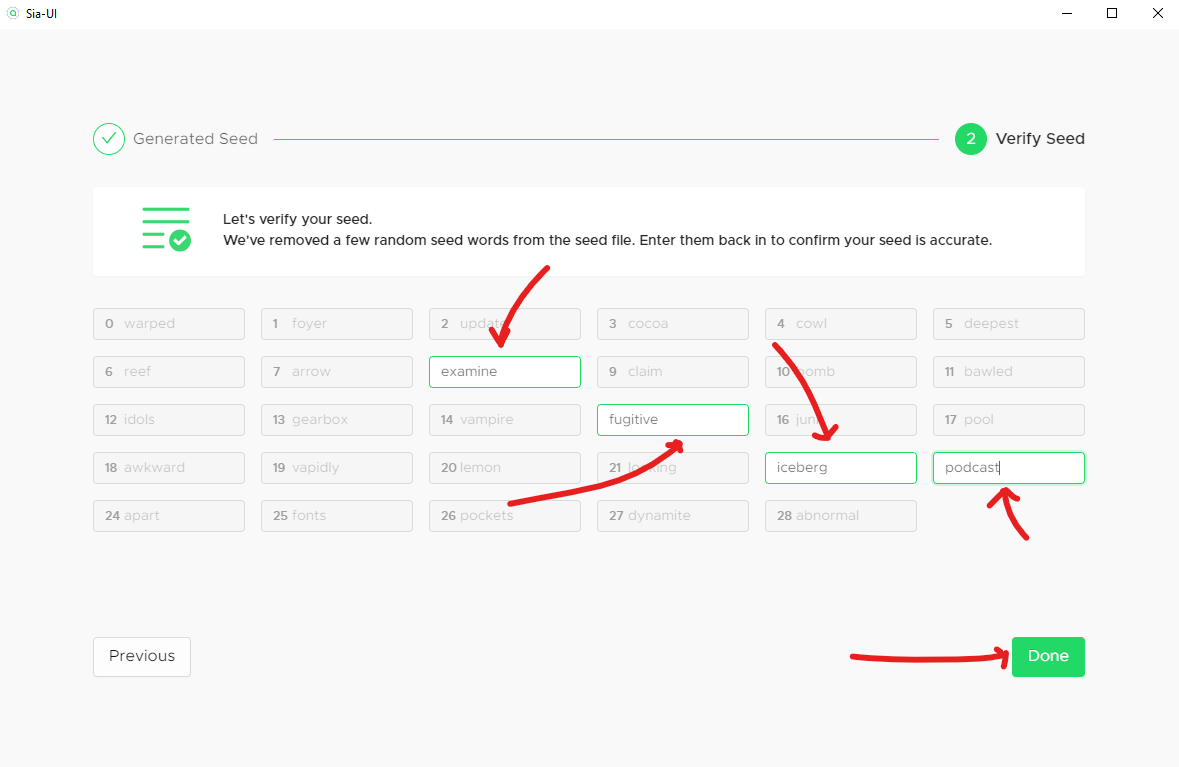
Now fill in the missing words and click “Done”
Now that you have done that you will see this.
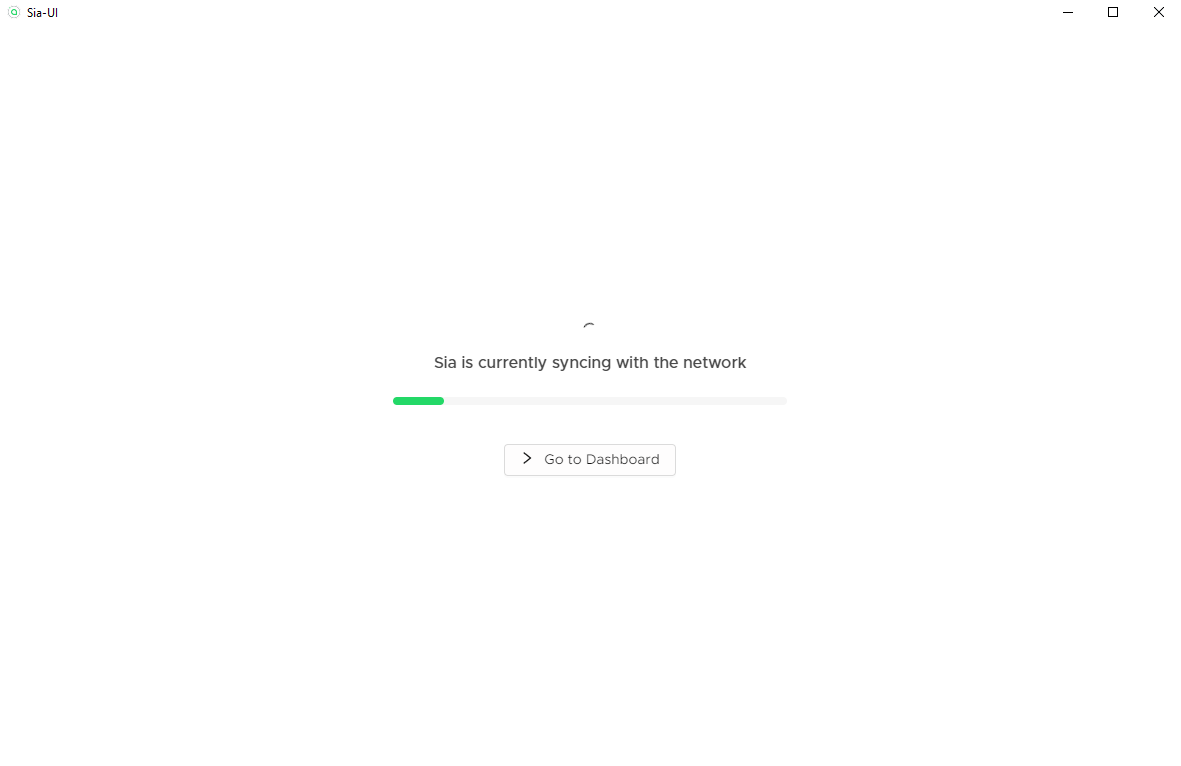
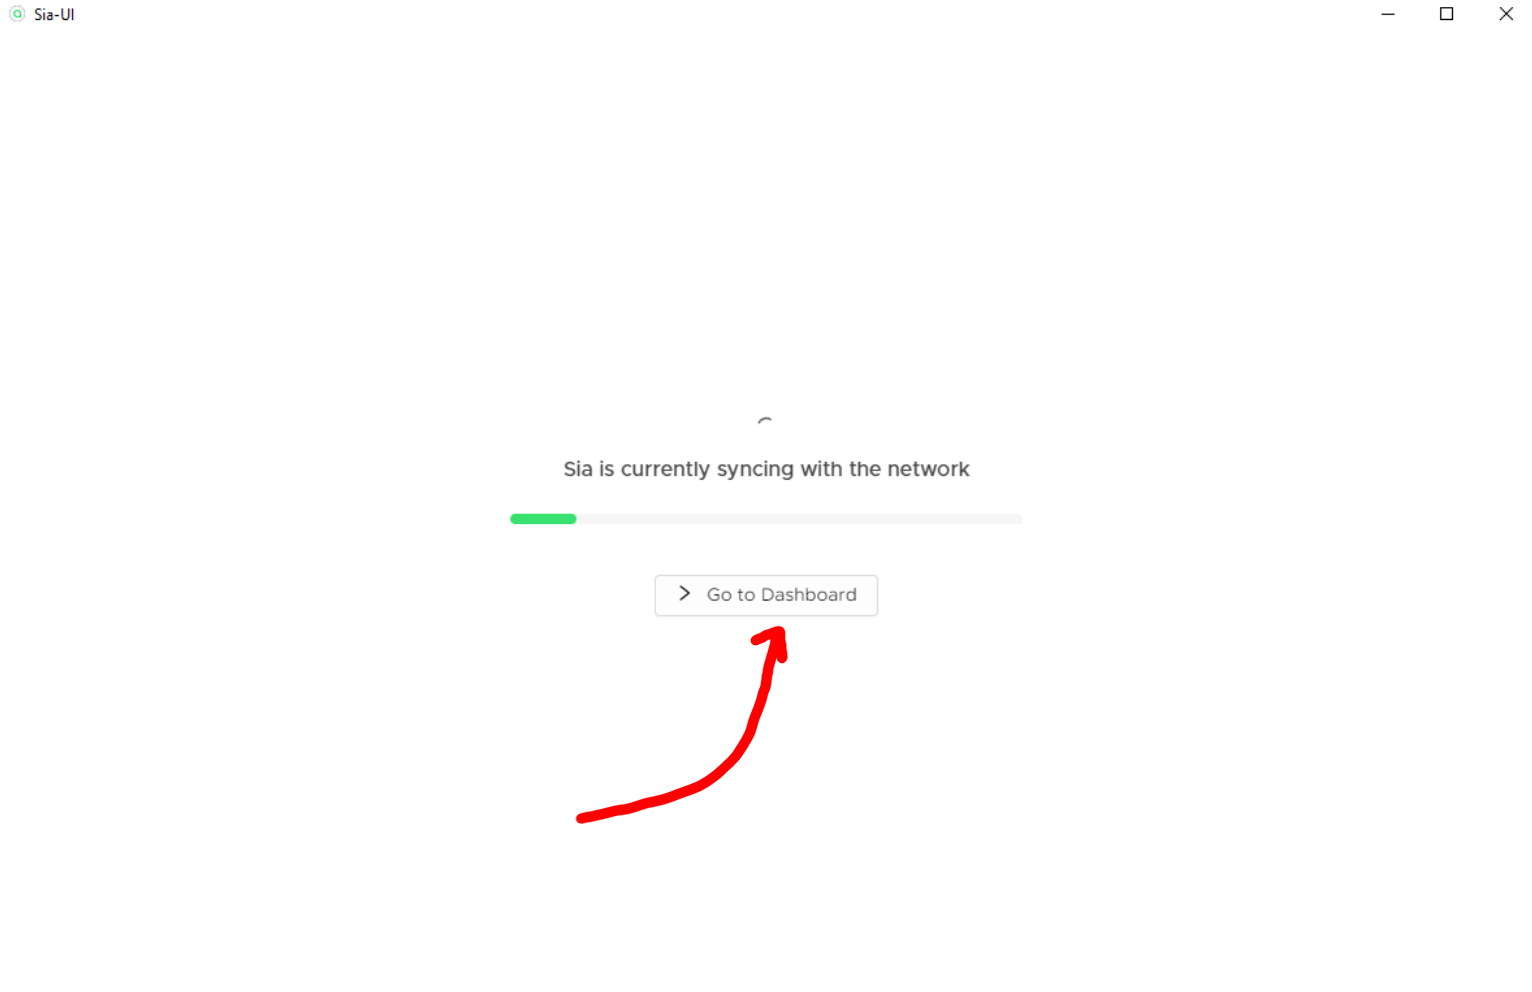
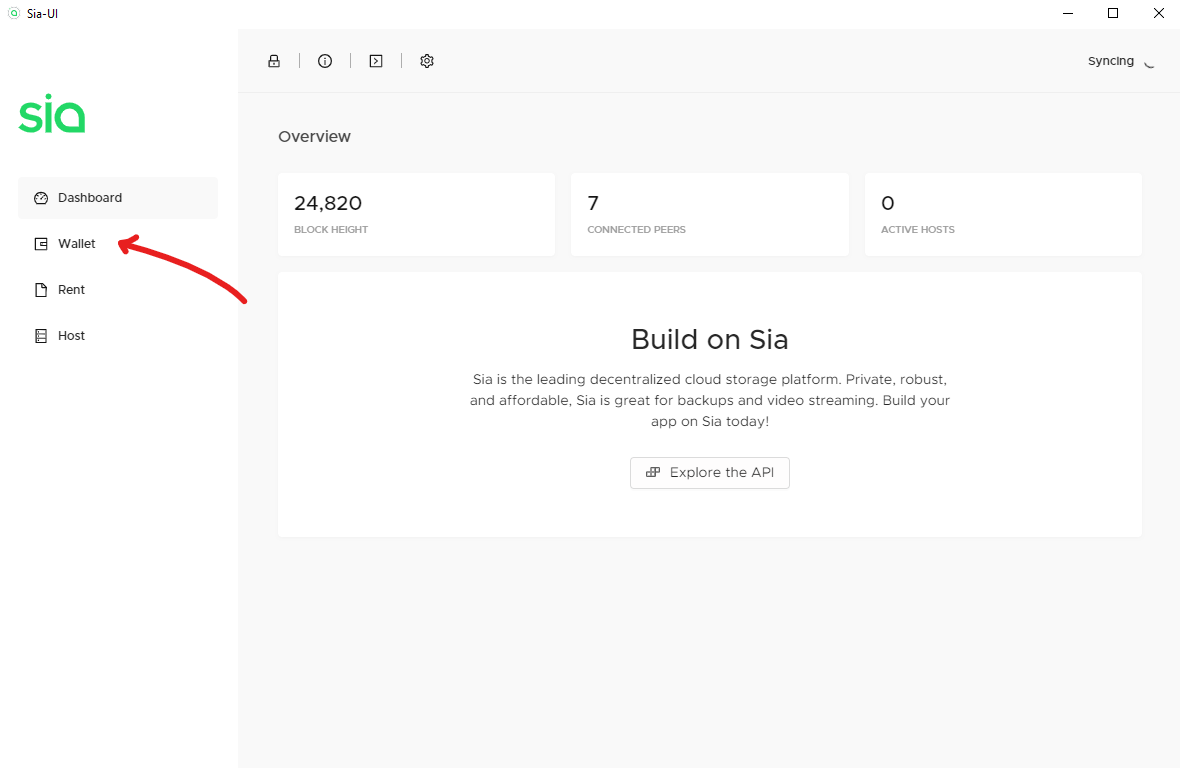
Before you bootstrap you’re going to want to send some coins to your wallet. Sending coins takes(on average) an hour, so getting it out of the way now is best. So to get an address to send the coins to, click “Go to Dashboard”
Then click on “wallet”
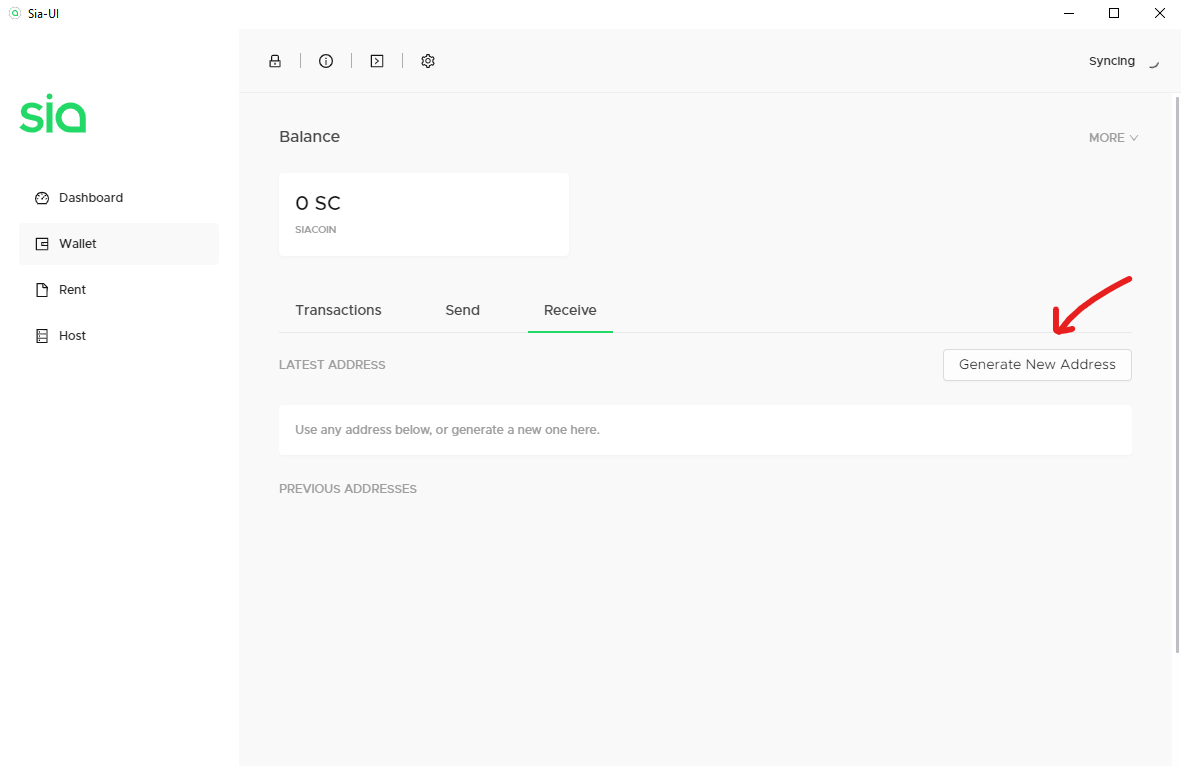
Then click on “Receive”

Then click on “Generate new Address”
Your new address will now show up under the “Latest Address” tab:
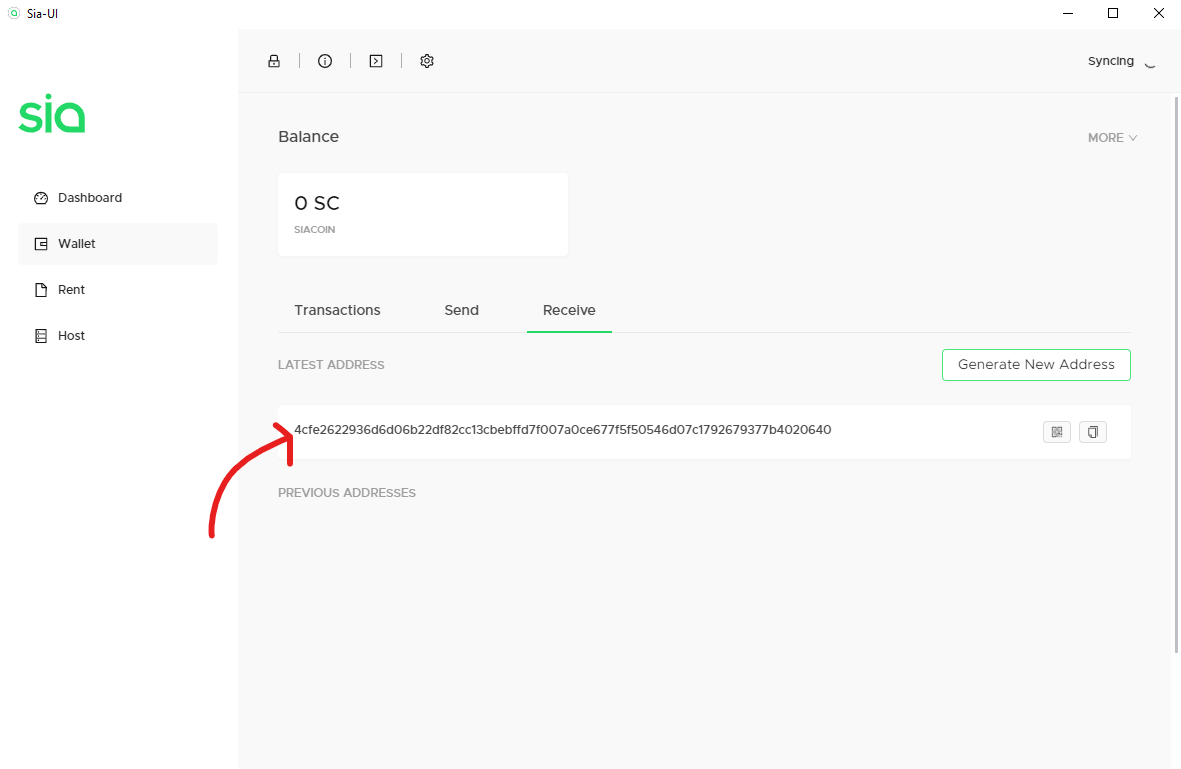
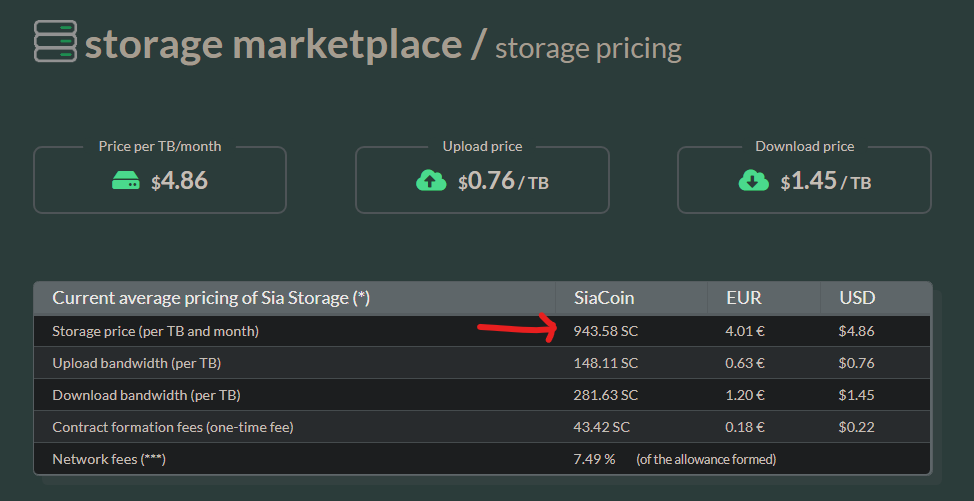
Now you are going to want to acquire some Siacoin and send them to this newly generated address. For more info on how, check out the here. Also now is a good time to figure out how much Siacoin (I will further refer to it as SC from now on) you actually need. The best metric to go off is the storage pricing on SiaStats, just take that pricing per TB in SC and multiply it by how many TB you need. Also keep in mind that since it costs money to form contracts with hosts (read more here), prices will be very high until about 1TB where it levels off to average pricing.
Once you send coin to your wallet you have two choices, bootstrapping and letting it sync naturally.
- Syncing naturally – This basically is just your node asking other nodes on the network for the history of all transactions one by one and it builds the consensus database on this. On a computer with a good connection, and SSD, and a beefy processor, it can take around 6 hours to sync. On a computer with worse hardware in general and an HDD, it can take 1-2 days to sync fully.
- Bootstrapping – Instead of letting your node communicate to other nodes and build the consensus itself, you download someone else’s consensus file to speed up the download and build process. This is only practical if you actually trust the person that you will be bootstrapping from. A borked consensus file can have security implications. On a computer with a good connection, hardware, and an SSD, it takes 1-2 hours to bootstrap, and with a HDD it takes ~6 hours. This tutorial will be using the bootstrap method to sync because I don’t want to waste too much of my time XD.
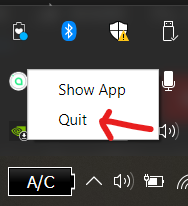
In order to bootstrap, force close Sia-UI like this:
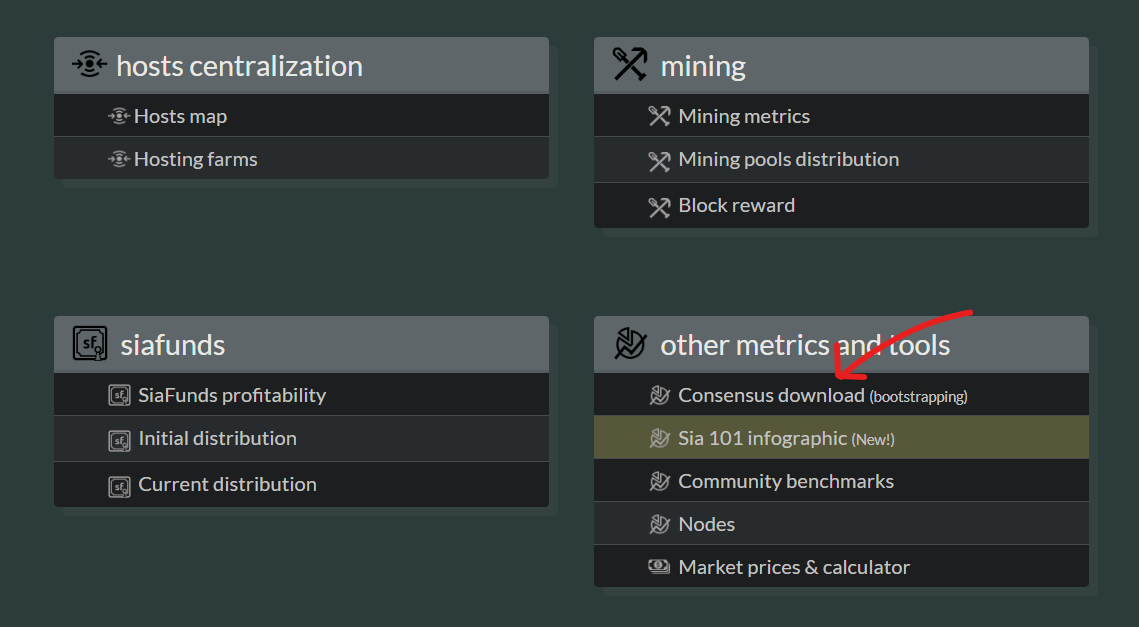
Now download the consensus file from a trusted community website(for the we’ll be using SiaStats). So head to Siastats and scroll to the bottom of the homepage. Then click “Consensus Download”
Now, click on the “bootrap.zip”
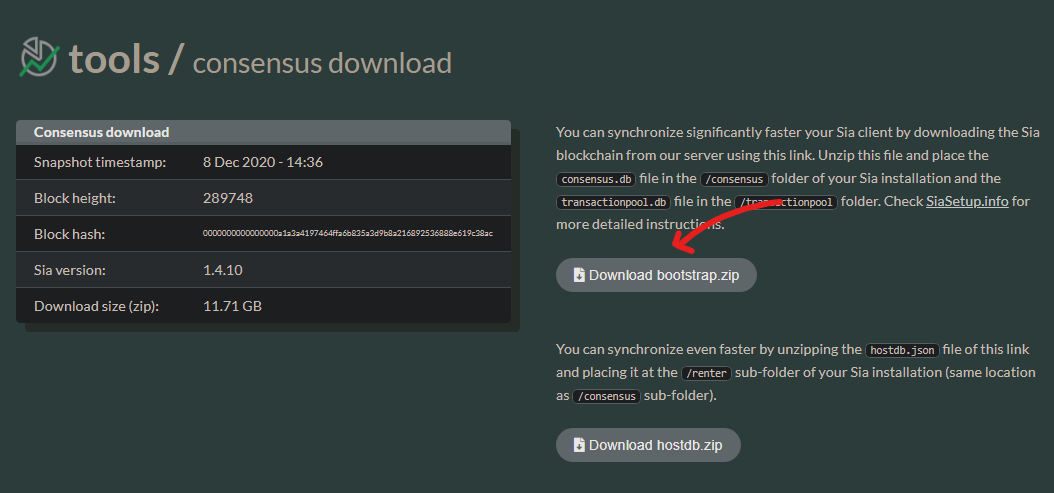
This is quite a large file and can take a long while to download. When zipped, it’s about ~11GB of storage, and once decompressed(how it has to be when in use) it takes up ~22GB currently(this grows over time).
This large consensus size is being worked on actively by the Sia Foundation as of now and likely in 2021/2022 there will be an implementation that allows you to run a full node with only a 50KB Utreexo chain state file.
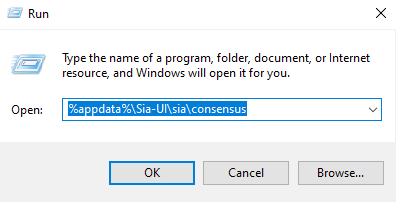
Now you have to navigate to the Sia folder so you can replace the consensus.db file with the bootstrap one. So to do that, press win + r to open the run window and type in %appdata%\Sia-UI\sia\consensus.
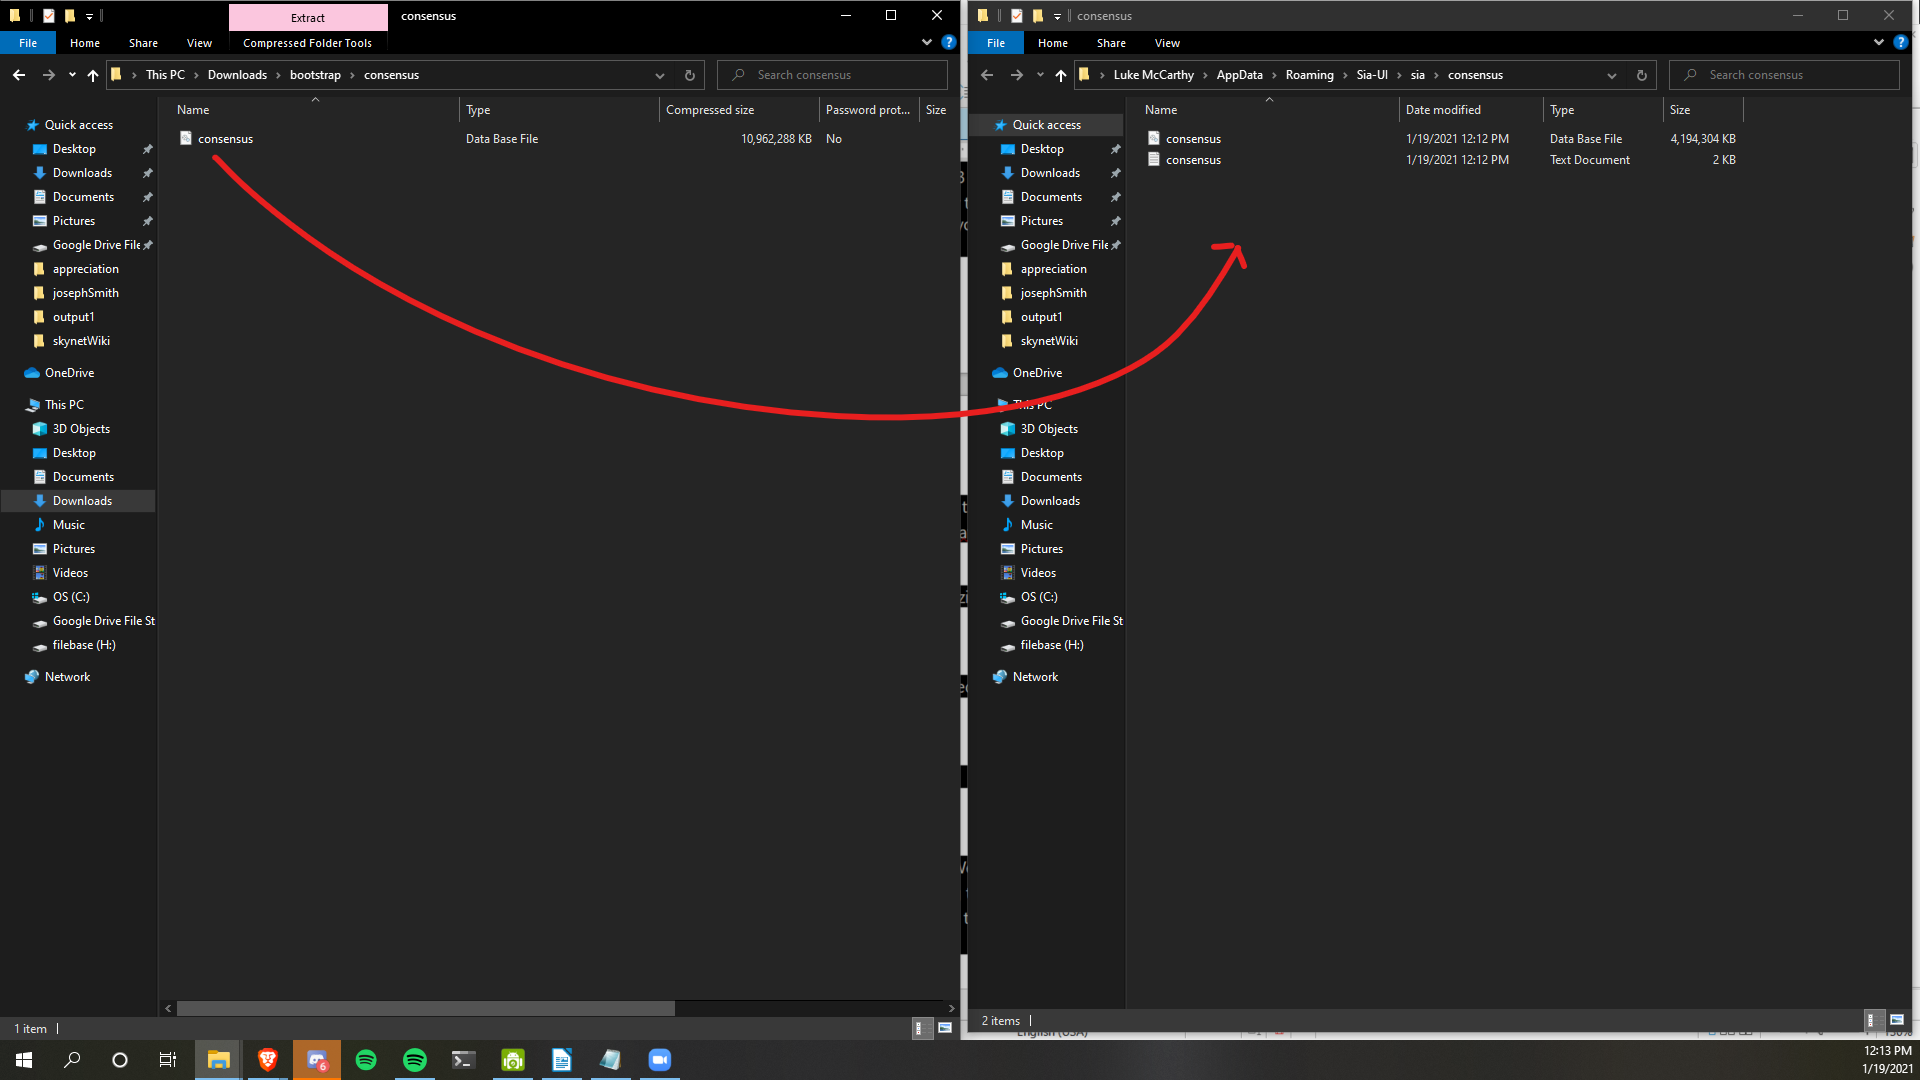
Open the bootstrap zip file and drag it into the consensus folder.
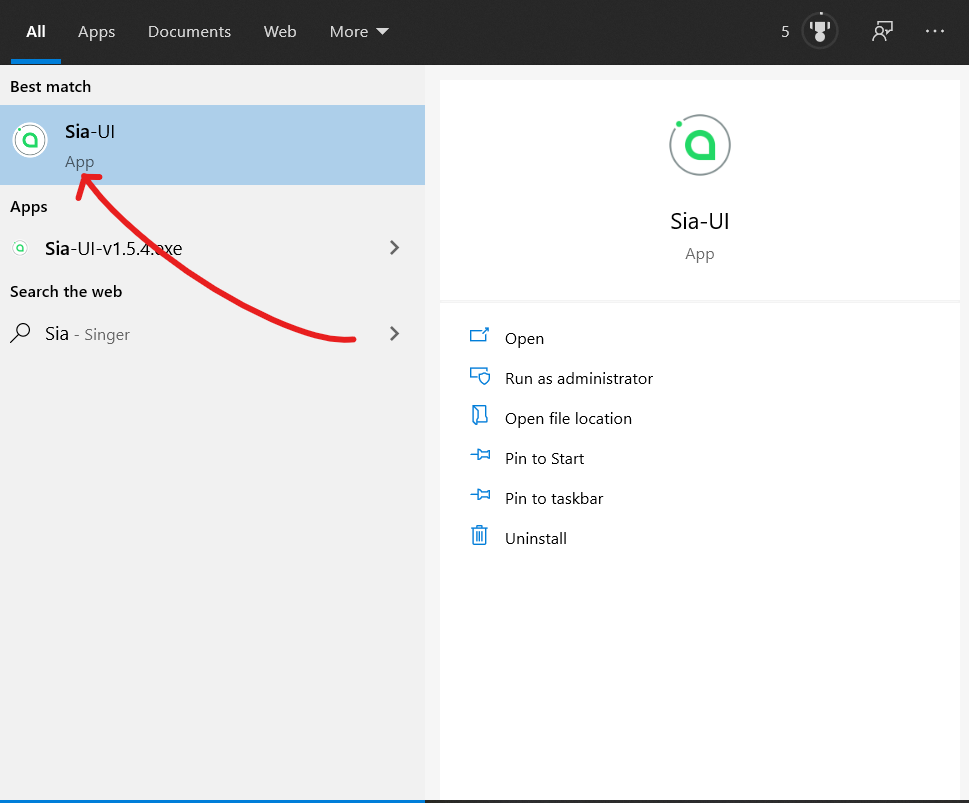
Now that that is complete, open Sia-UI.
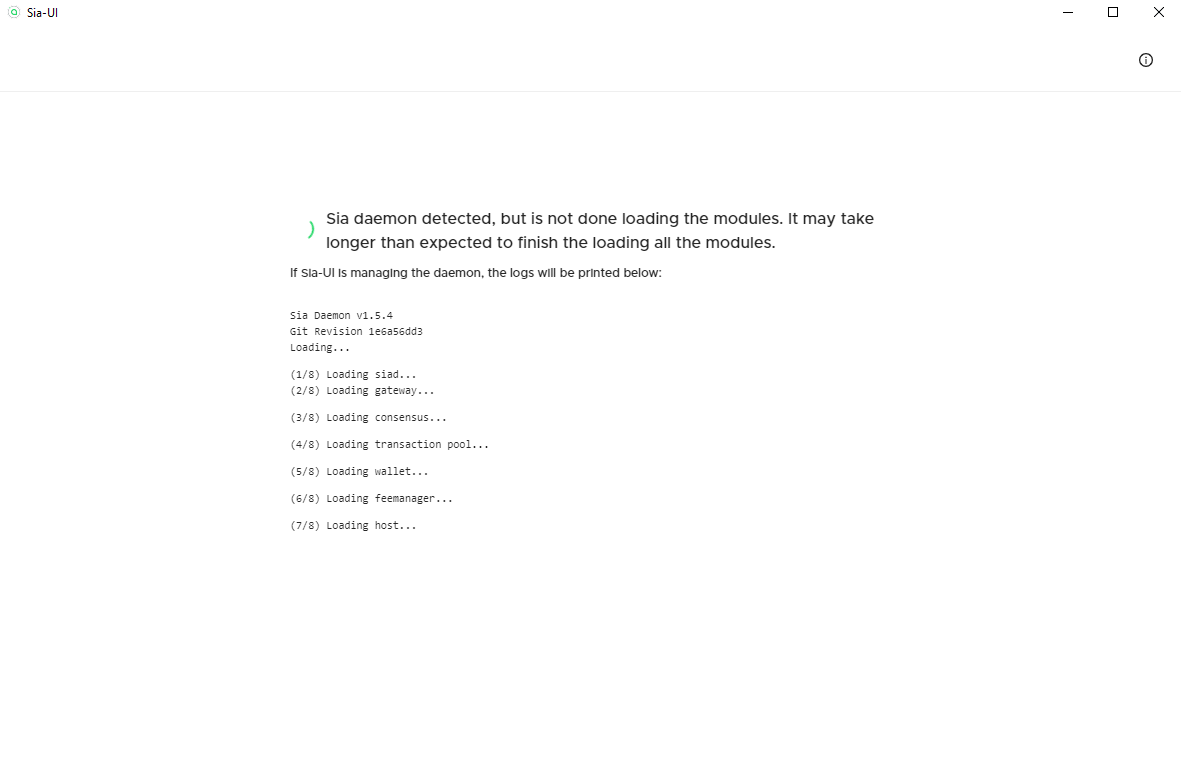
And now we wait. One may ask, “what is it doing right now?” Well, despite having the consensus caught up, all of the other modules have not caught up. So it is effectively scanning through all previous blocks to fill out the other databases it uses. On a computer with a beefy CPU and SSD, it takes ~1 hour to sync up, and on a weaker computer with an HDD, it can take around ~6 hours.
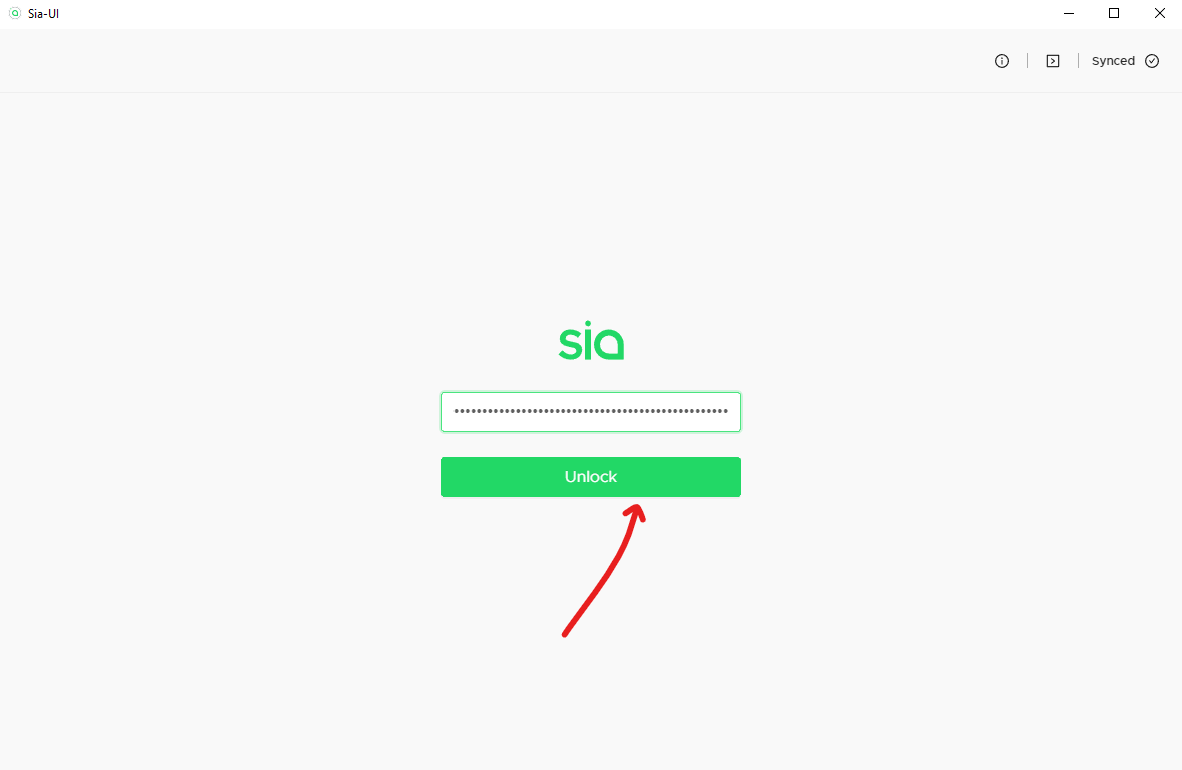
Now that it has loaded, you have to put your seed back in and click “unlock”
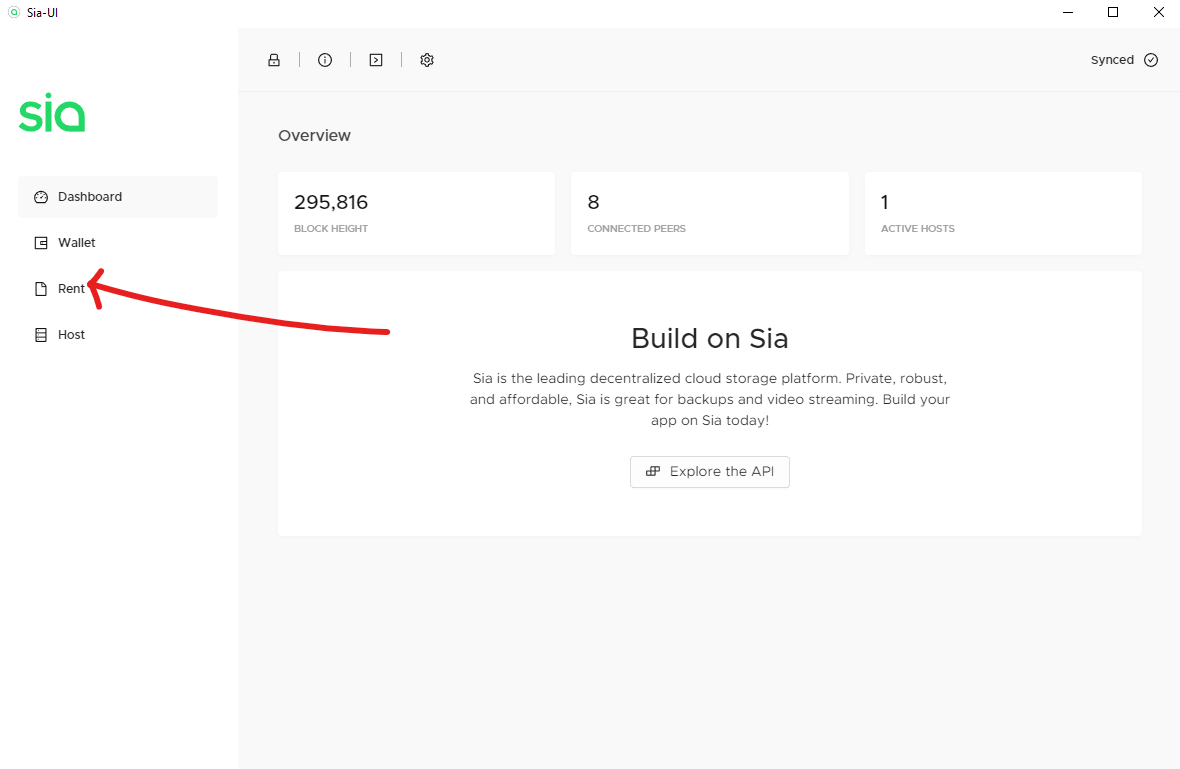
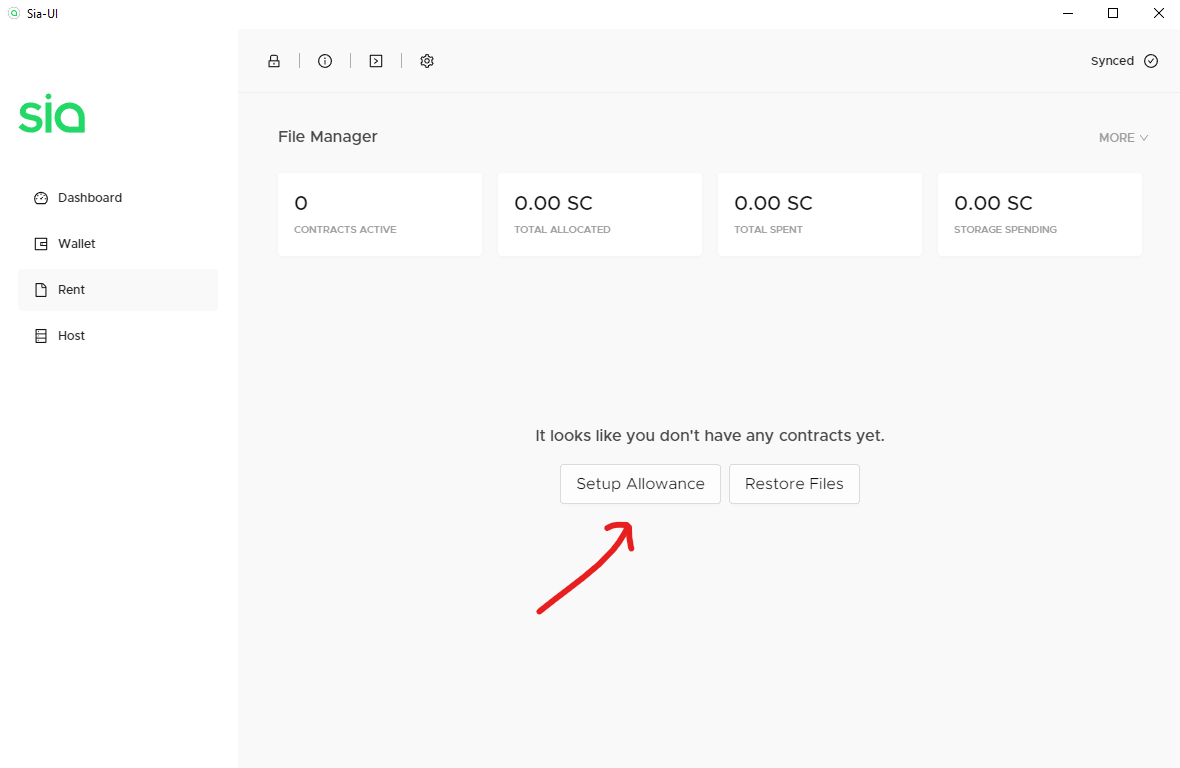
To begin renting go to the “Rent” tab
Then, based on the SiaStats pricing(I’d generally recommend taking the storage pricing on Siastats and multiplying it by 1.5), you’re gonna want to set your allowance to that.
Click on “Setup Allowance”
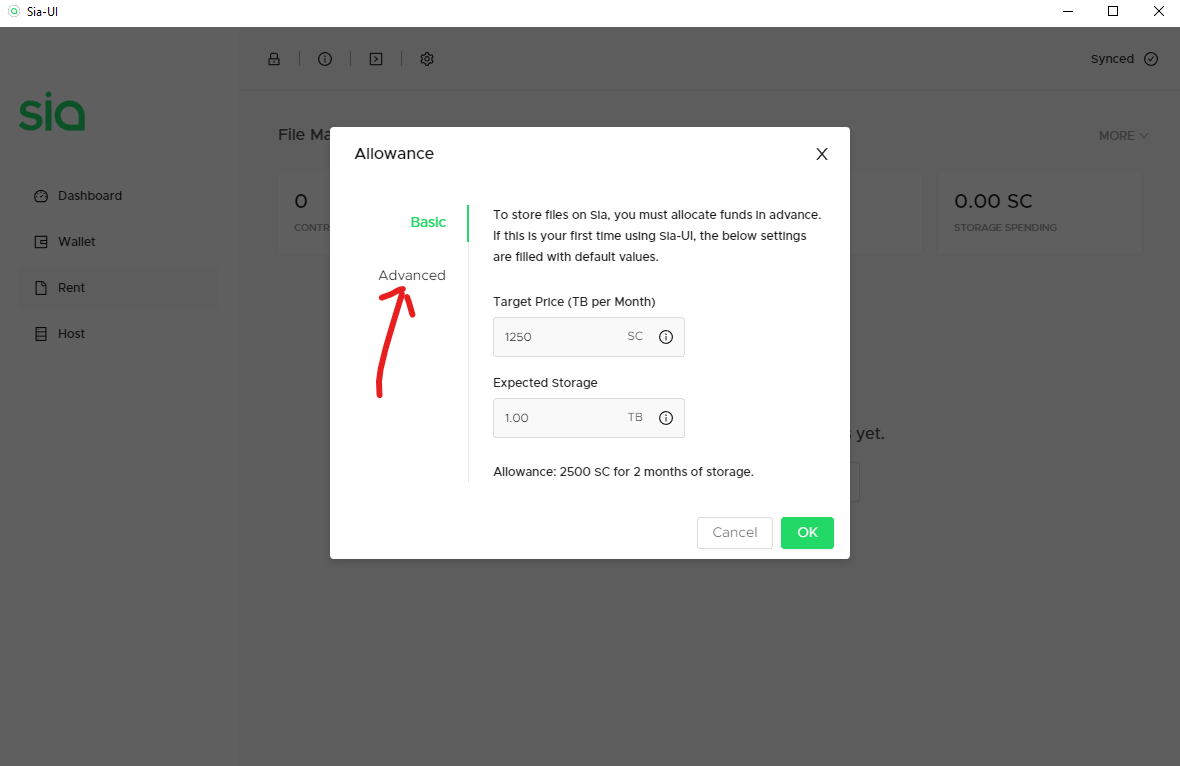
So go to the “Advanced” tab for a tad more control.
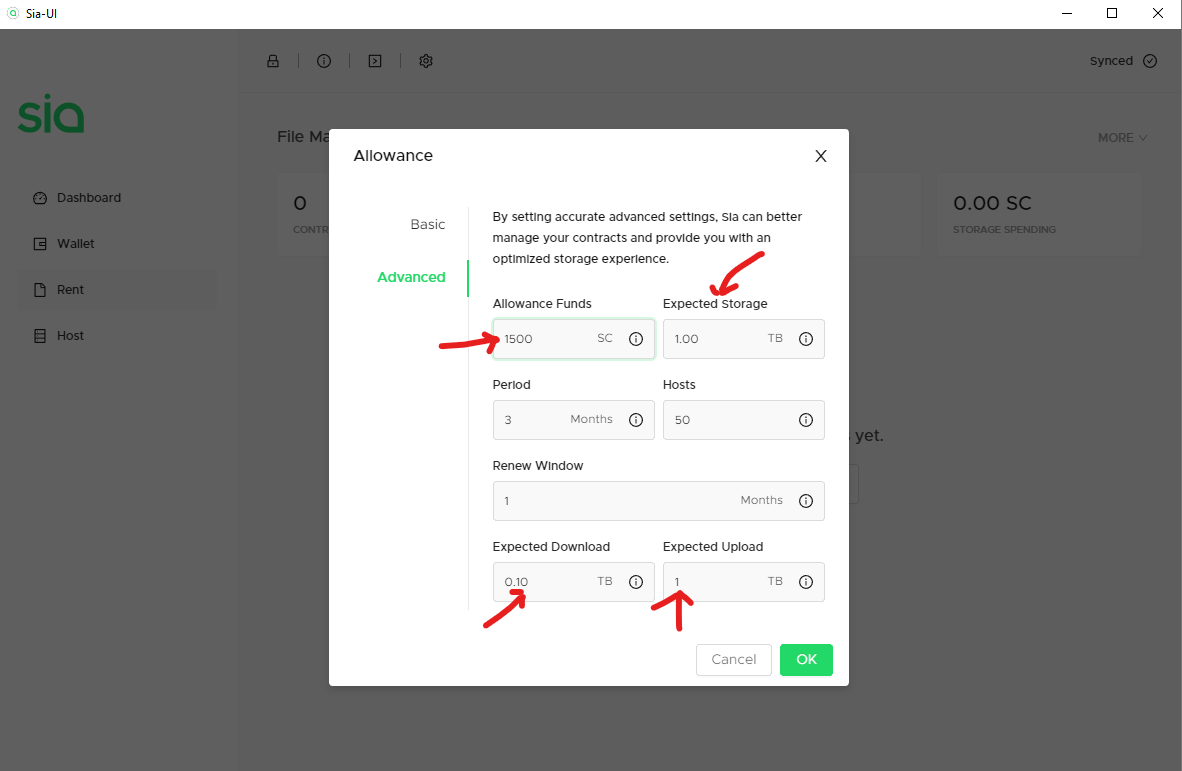
Now that you’re in the tab, you can edit the “Allowance Funds” in accordance to as described earlier, “Expected Storage” in accordance to how much you want to store, “Expected Download” to however much you presume you will download, and “Expected Upload” to roughly the same as expected storage(because you have to upload the data you store of course).
Keep in mind that the allowance is kinda fluid so you can always increase it later with no issues. Also, if you don’t put in enough funds, you will run out and not be able to download files anymore once uploaded(to troubleshoot common issues, see here).
Make sure to keep hosts set to 50, the contract period to three months, and the renew period to one month. To learn more about the technical side of how renting functions and why they must be set to this, see here.
Now that the allowance has been set, the final waiting game will commence. Only 10 contracts can be formed per block(each block takes 10 minuets to occur on average, too see the latest blocks see SiaStats). So to form the 50 contracts required to rent, it generally will take about an hour. You can begin to upload data at the 30 contract mark, but it will be very slow until it reaches 50 contracts.
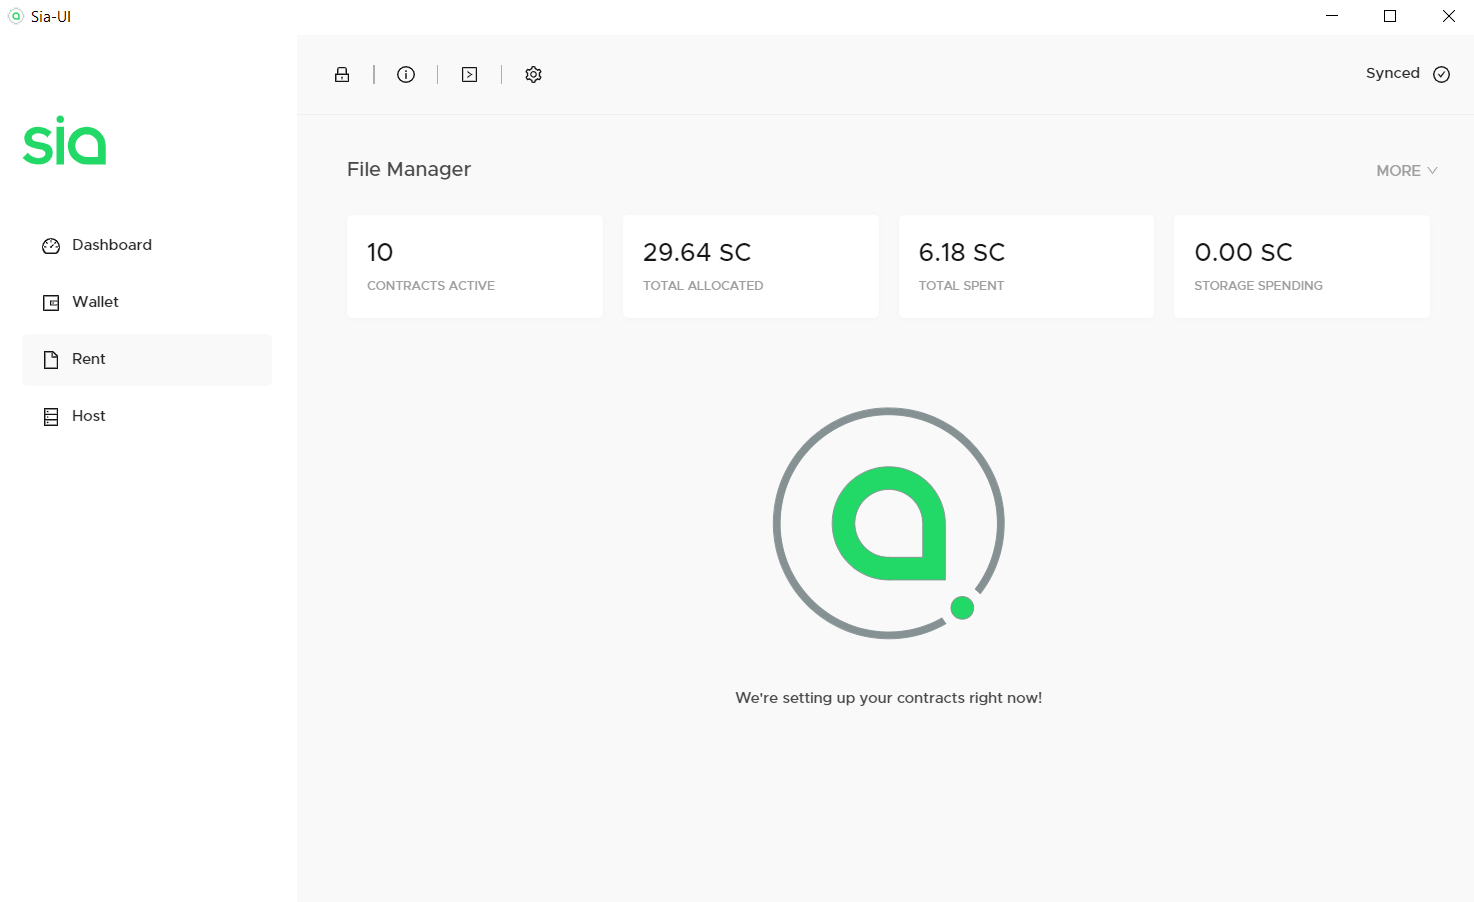
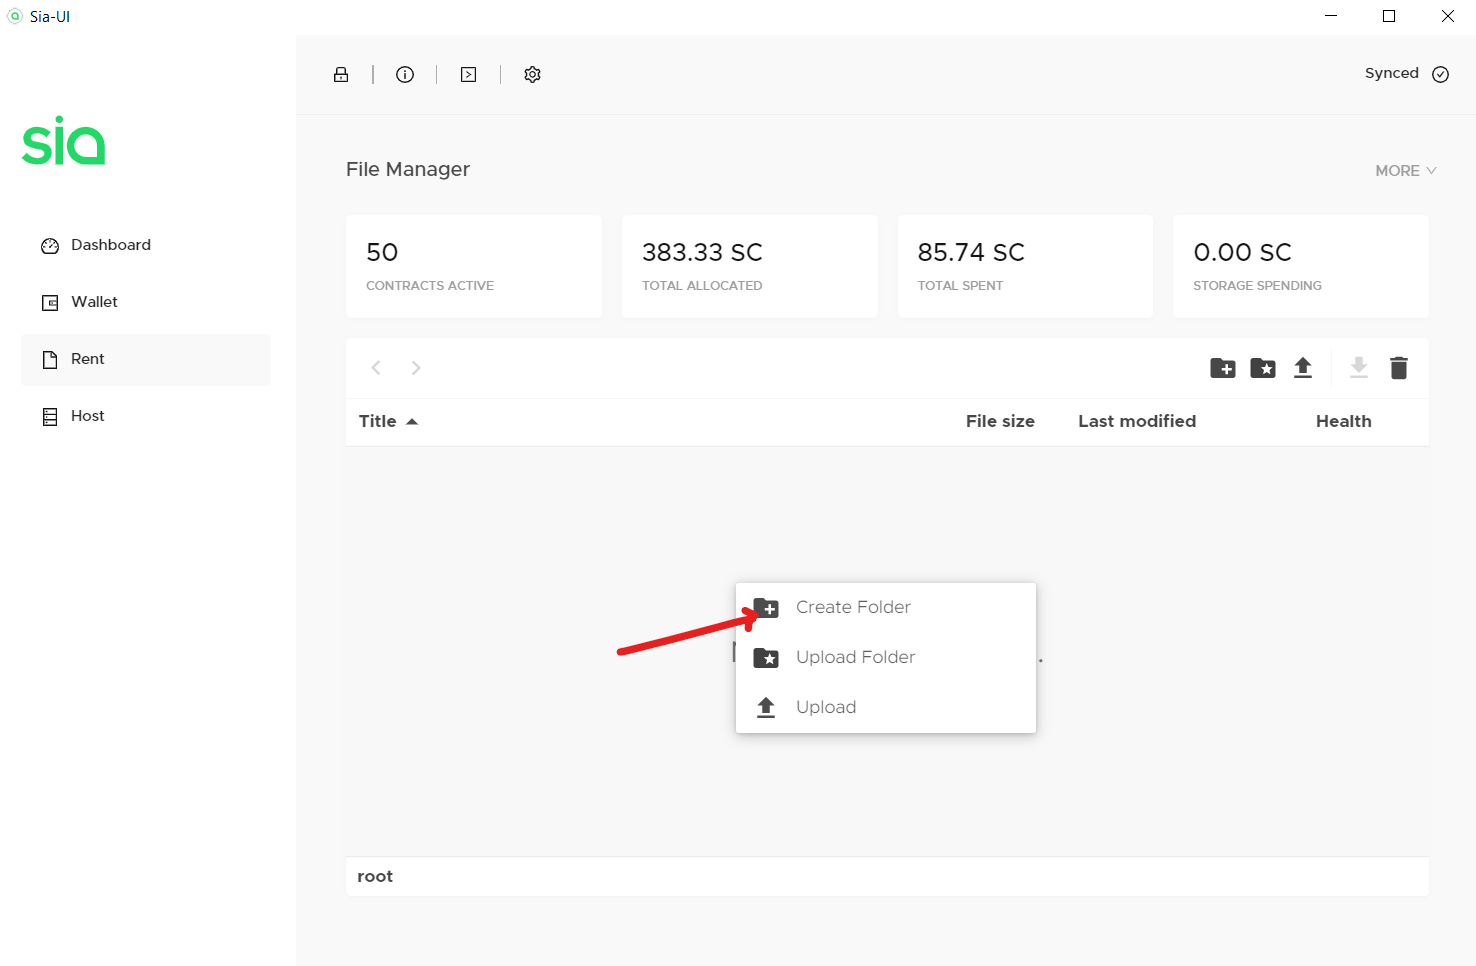
Now that you have formed 50 contracts, you can begin to upload files by dragging creating a folder by right clicking and hitting “Create Folder”
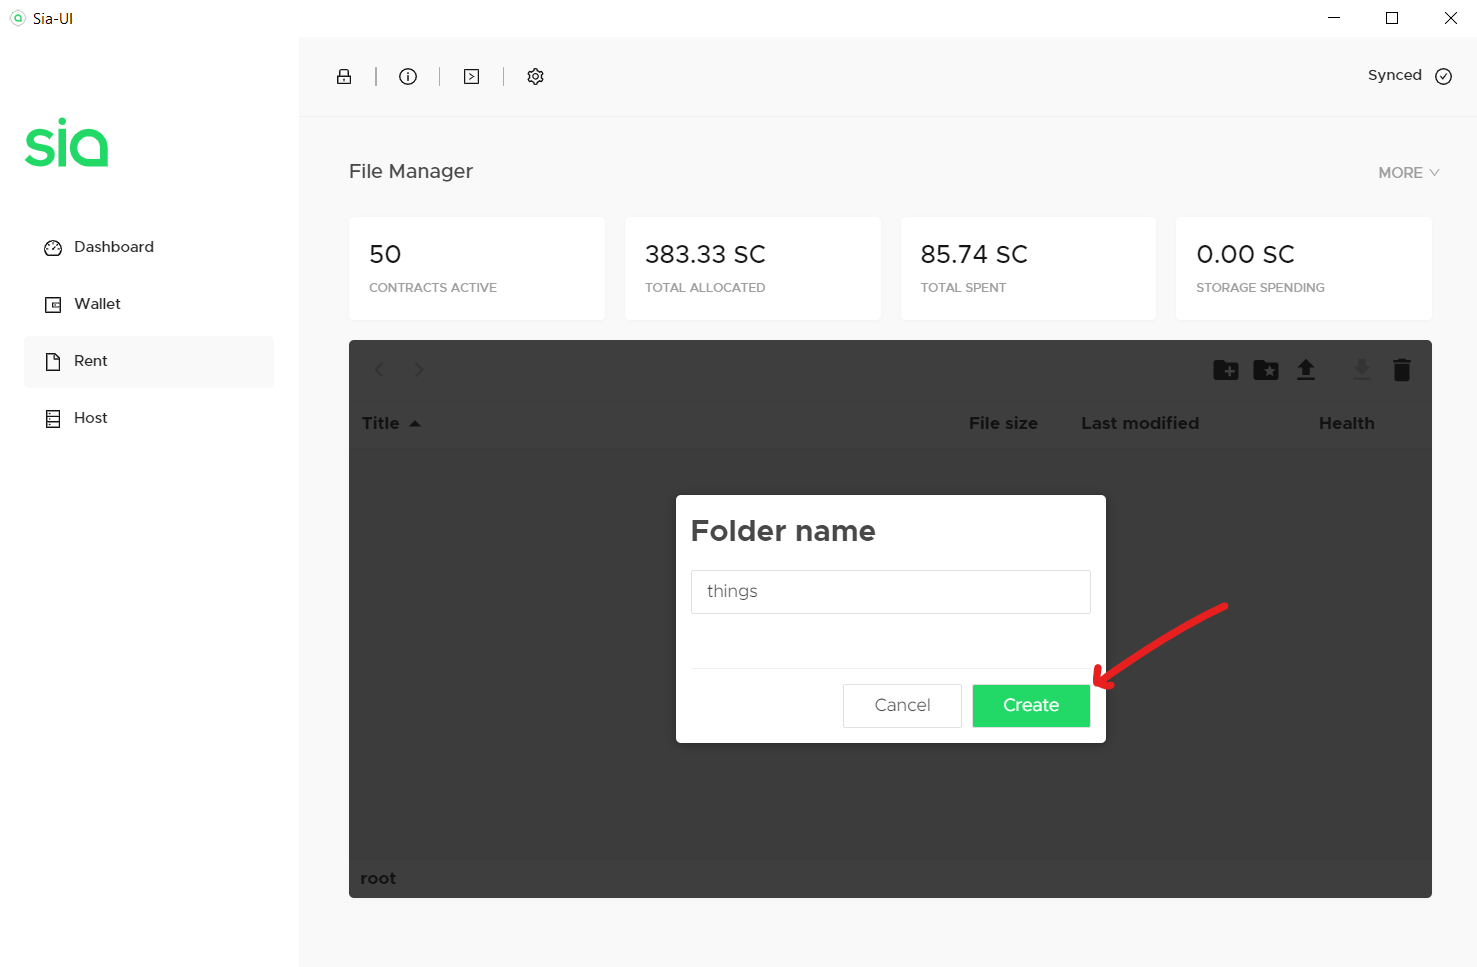
Then name a folder and click “Create”
Now once in the folder, click on the up arrow and select a file with the file picker:
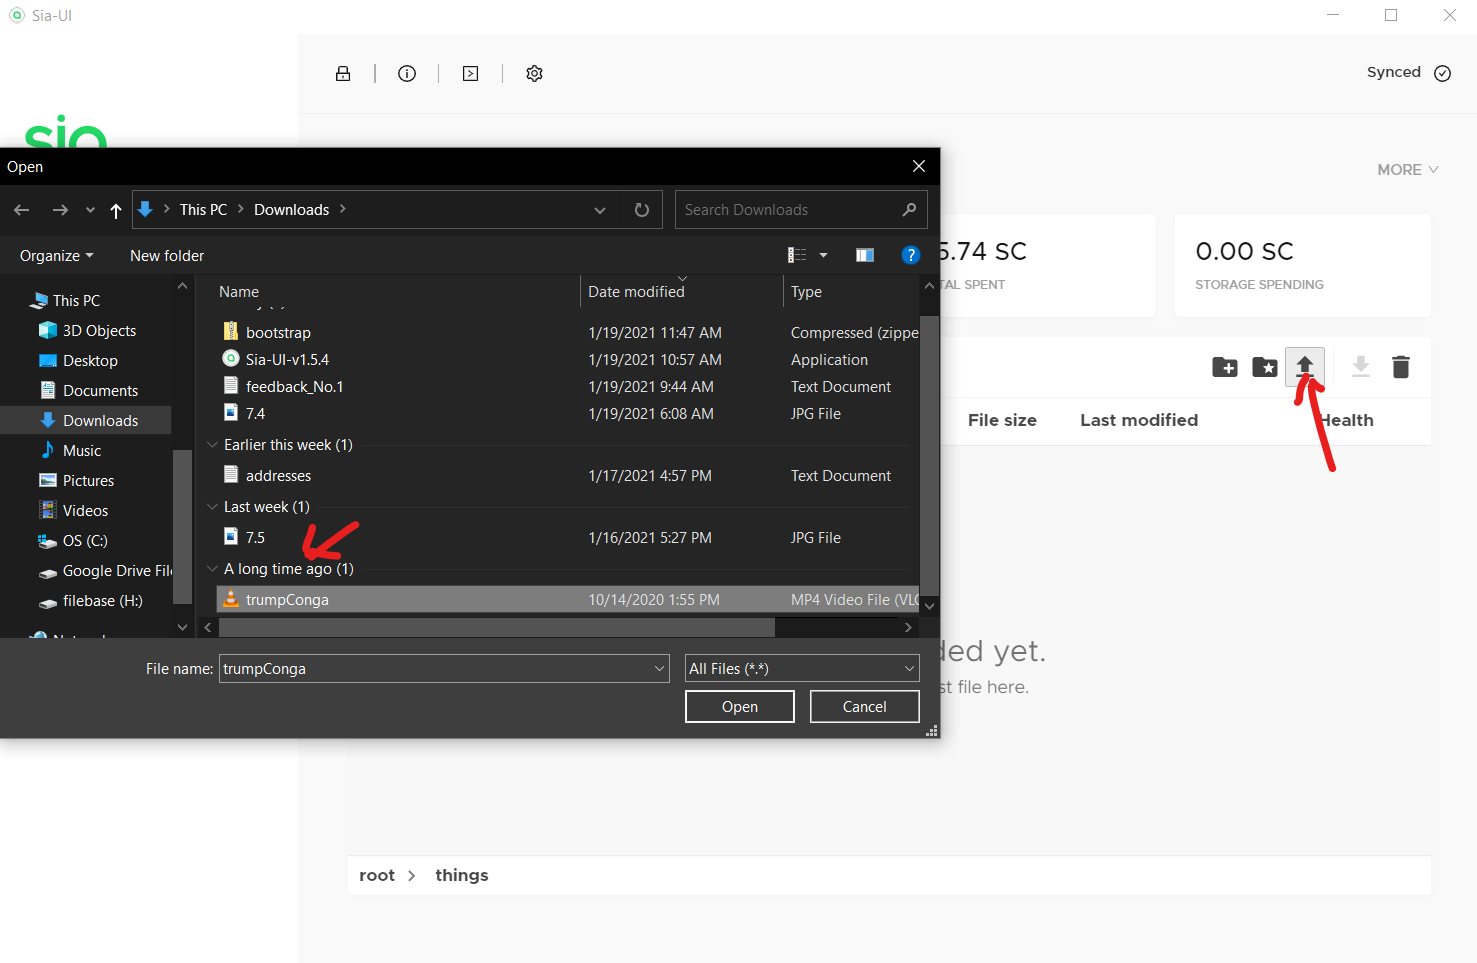
Give that a bit of time to upload
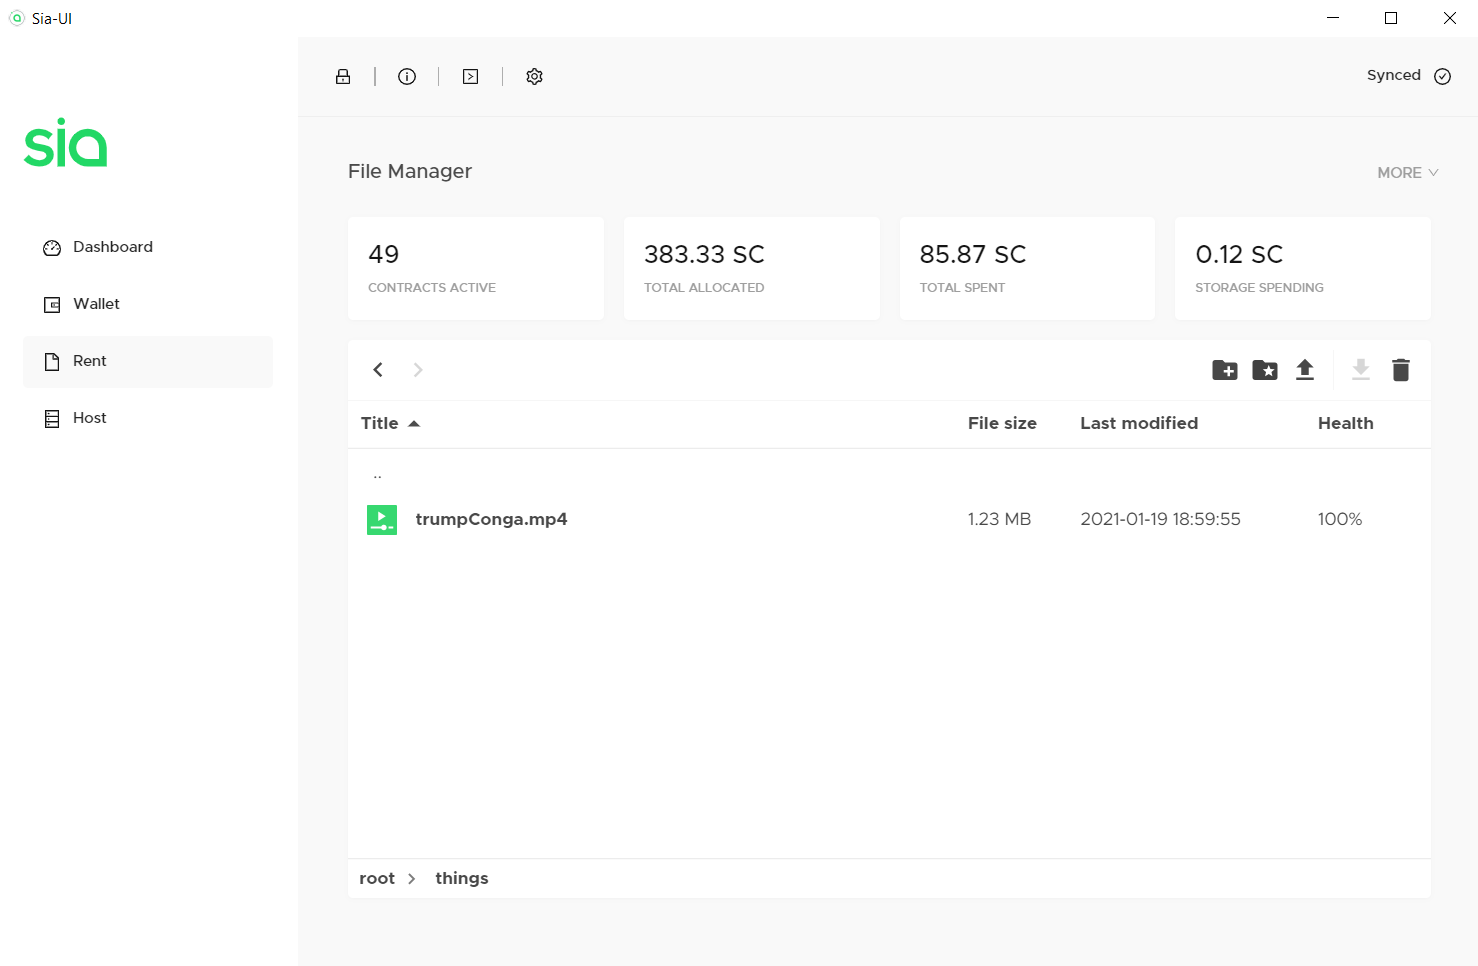
Side note, the minimum file size on Sia is 40MB and the redundancy of
siac(the underlying code that Sia-UI uses) is 3x, so no matter how small the file is, it takes up 40MB of paid space and 120MB of paid upload bandwidth to send it to three hosts. To understand why it’s like this, read here.
And your file has now been uploaded to the decentralized web!
For more info read around the site or check out the Sia Discord, we’re always here to help!
Written by: Covalent, Last Edit: April 14, 2021